
When you first learn how to do a backbend, you will almost immediately feel its benefits on your body, such as the relief in the muscles around your spine. But as you move into deeper, more challenging poses, they can also build more confidence to help you get out of your comfort zone.
“Since we can’t actually see our backside, in a metaphorical sense, backbends can help us overcome fear by teaching us to lean into the unknown,” says Yoga52 instructor and AYP-certified yoga instructor , Brent Laffoon.
Whether you want to dive headfirst into deep turns or make more subtle variations, here are some stances to get you started.
How to do a standard backbend
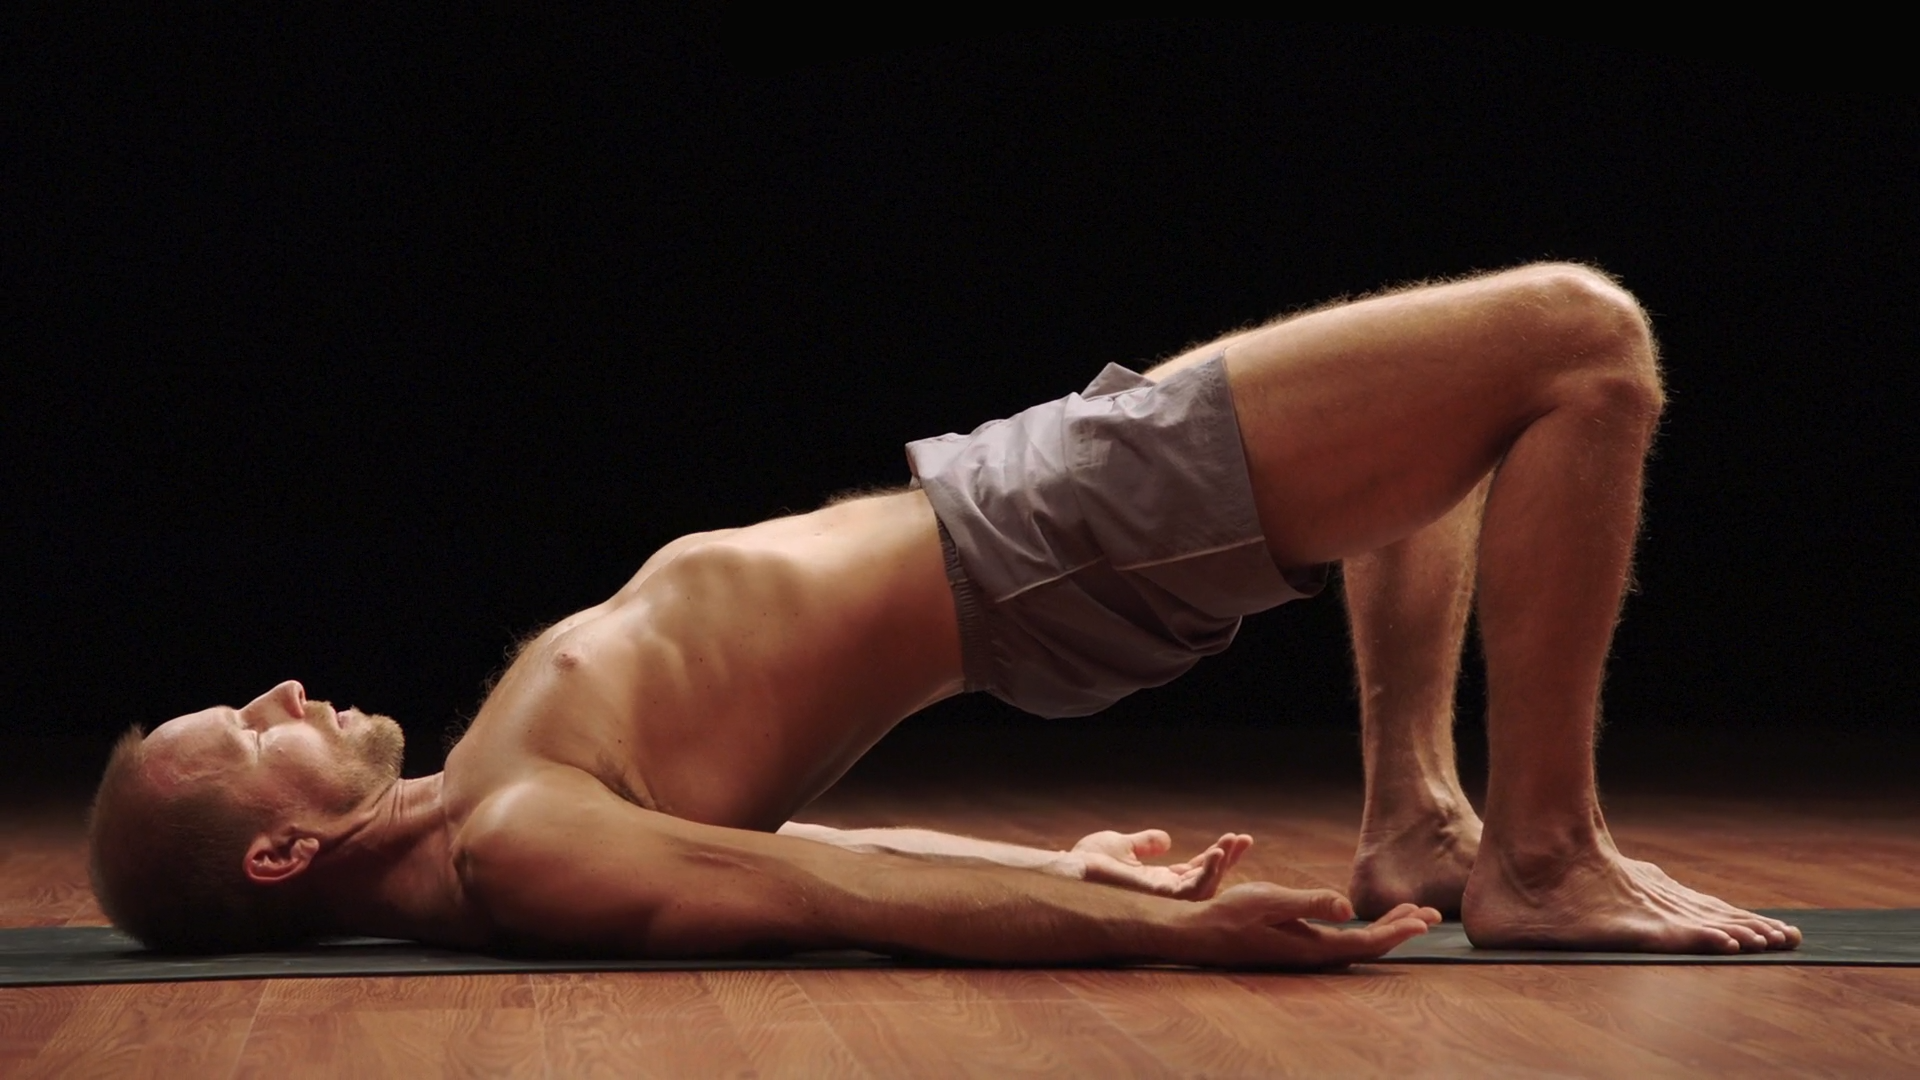
Beginner: bridge pose (Setu bandha sarvangasana)
- Lie on your back with your arms at your sides. Walk your feet toward your buttocks with your knees bent and feet flat on the floor.
- Press through your heels and squeeze your glutes as you lift your hips off the floor. Option to interlock your fingers under you.
- Keep your eyes on the ceiling. Avoid looking from side to side to protect your spine.
- Hold for three to five breaths before releasing. Repeat as desired.
Advanced: wheel pose (Chakrasana)
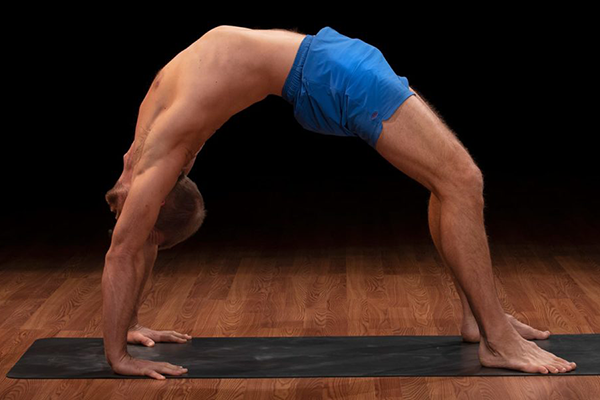
- Lie on your back, bend your knees and straighten your legs on the floor. Walk your heels closer to your buttocks until your knees are in line with your toes.
- Stretch your arms toward the ceiling and bend your arms. Bend your elbows and align your hands with your ears. Point your fingers forward toward your shoulders.
- Press through your legs and arms at the same time to lift your hips off the mat. Stay here for a breath.
- Continue to press into the mat, then lift your head off the floor. Let it hang between your hands. (All weight should remain on your arms and legs.)
- Hold the pose for several breaths up to one minute, keeping your knees hip-width apart.
- To release your wheel, bend your elbows and slowly lower your head to the mat and then your hips.
6 Backbend Yoga Poses
Many yoga poses use rachis and some are more challenging than others. Laffoon suggests that if you’re starting out, it’s best to do some stretches, like sun salutations and simple twists, to prepare your spine.
1. Cat-Cow Pose (Bitilasana and marjaryasana):
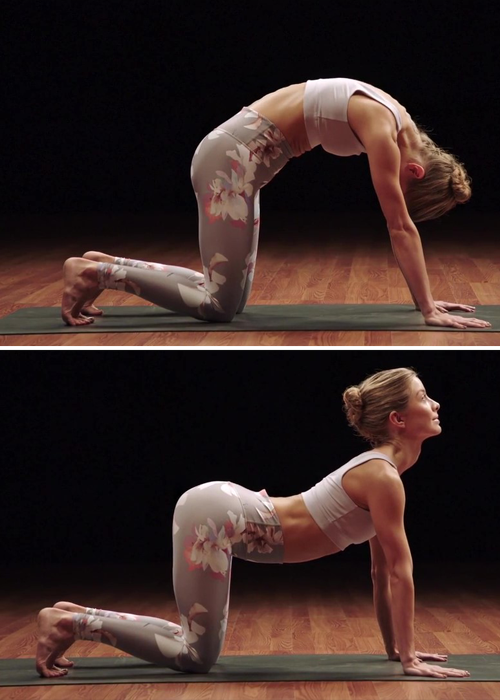
Inhale: Cow pose
- Get down on all fours, with your knees under your hips and your hands under your shoulders. Keep your back flat, your gaze towards the floor and your neck long.
- As you inhale, lift your tailbone and chest toward the ceiling while dropping your belly toward the mat.
- Keep your shoulders away from your ears, shoulder blades wide in your back and your head in line with your torso.
- Exhale in cat pose.
Exhale: Cat pose
- Start in cow pose.
- As you exhale, round your back, curl your tailbone, and tuck your chin toward your chest.
- Keep your shoulders and knees in place.
- Inhale into cow pose.
- Repeat this flow for up to 10 breaths, or longer if desired
2. Grasshopper Pose (Shalabhasana)
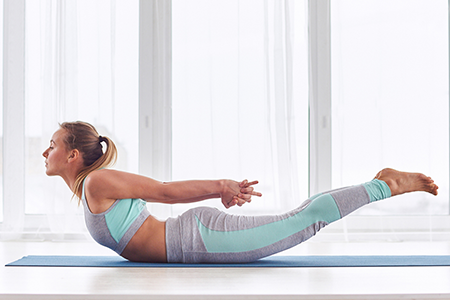
- Lie on your stomach with your legs together and your arms at your sides. Rest your forehead on your mat to protect your neck.
- Inhale to lift your head off the mat and look forward as you simultaneously squeeze your inner thighs together to lift them off the floor.
- Take your hands off the mat and squeeze your shoulder blades together to widen your collar bones.
- Rock forward so you’re on your belly and not your hip bones.
- Hold for a few breaths or up to a minute.
- Return to the starting position and then rest.
3. Cobra pose (Bhujangasana)
- Start in a plank and lower to the floor. Release your hands from your shoulders. Untuck your toes and press the tops of your feet into the mat.
- Spread your legs and bring your thighs together so they touch.
- Inhale, press into your palms or fingers and lift your chest off the floor using the muscles in your arms and back. (Raise your chest only to a height that does not put pressure on your lower back.)
- Keep your elbows tucked in by your sides. Open your chest and pull your shoulders away from your ears.
- Hold for a few breaths before lowering back down.
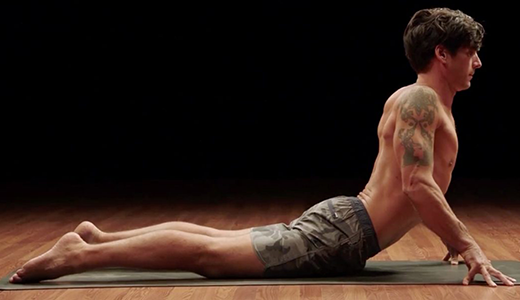
4. Upward-Facing Dog Pose (Urdhva mukha svanasana)
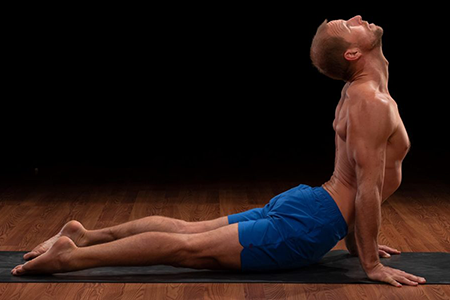
- Start in a plank and lower to the floor. Release your hands from your shoulders. Untuck your toes and press the tops of your feet into the mat.
- Spread your legs and bring your thighs together so they touch.
- Inhale, press into your hands, straighten your arms, and lift your thighs off the mat by pressing into your legs.
- Place your shoulders directly over your wrists. Look straight ahead to protect your spine.
- Hold for a few breaths before lowering back down.
5. Camel pose (Ustrasana)
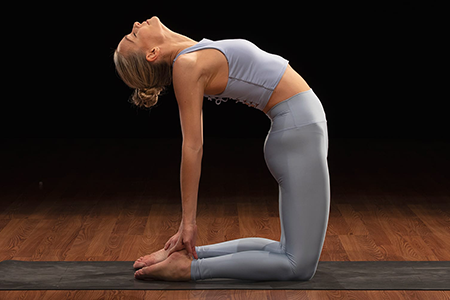
- Start in a kneeling position and place your knees directly under your hips. Push the tops of your feet into the mat.
- Place your hands behind your back and rest your palms on your sacrum with your fingers pointing down towards the floor.
- Lift your chest and engage your core. Squeeze your glutes and pull your hips and thighs forward, arching your spine.
- Start by looking up at the ceiling as you lean back (and you can see the back wall), opting to drop your head back.
- Hold for at least five breaths, up to one minute.
- To return to the starting position, squeeze your glutes, engage your core, and pull yourself back to the starting position. Let your head rise last.
6. Bow Pose (Dhanurasana)
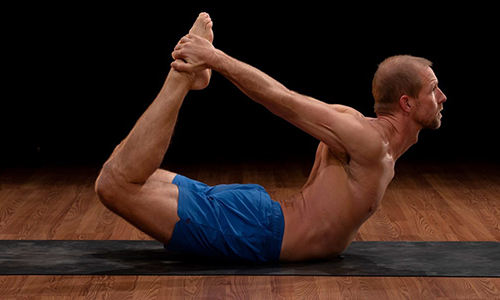
- Lie face down on your mat, feet hip-width apart, forehead resting on folded hands.
- Press the tops of your feet into the floor and straighten your legs as you stretch your tailbone toward the floor. Notice a subtle lift below your belly button.
- Lift your forehead from your hands and lift your chest as you simultaneously squeeze your glutes and the backs of your legs toward the floor.
- Extend both your arms behind you at the same time, rotating them so that your palms are facing each other, and bend your knees.
- Lift your chest and legs high enough so that you can grab the outside of your ankles (not the tops of your feet). Try to keep the soles of your feet parallel to the ceiling.
- Keeping your knees hip-width apart, keep your ankles steady so that the resistance of your legs back helps keep your chest up.
- If your upper back moves well and you can look up, try it. Avoid throwing your head back and try to move your shoulder blades down and away from your ears.
- Hold for a few breaths, then slowly release and rest on your belly.
5 Benefits of Backbends
Laffoon is a big fan of backbends, especially the cobra pose. Here are the benefits that backbends can have on your body and mind.
1. Release the tension
Backbends help you extend your spine and find release in places where you hold a lot of tension, such as the lumbar spine and sacrum.
2. Improve posture
Most people lean forward all day, which puts pressure on the spine, especially when we’re on the computer or texting. Backbends can combat poor posture by strengthening the levator scapulae, the main muscles involved in creating healthy posture, says Laffoon.
3. Amp up the energy
Yoga backs are especially energizing and rejuvenating, says Laffoon. This is because they bump into you circulatory system, which increases cerebral blood flow.
4. Reduce stress
BKS Iyengar, the founder of Iyengar yoga, recommended yoga backbends to his students to boost their mood, and he had something: This study shows that 52 women were able to reduce anxiety and anxiety-related symptoms with just 12 yoga sessions.
5. Promotes deep breathing
Backs open your shoulders and chest, which can make more room for your lungs.
When you open your chest, you increase your capacity for deeper breathing, thus supporting your cardiovascular health. And this study mentions yogic breathing as a way to lower blood pressure.