")
We are officially in the post-school energy slump. You know the one: kids come home tired, hungry, and somehow also have to get to an activity, a friend’s house, home, or all of the above.
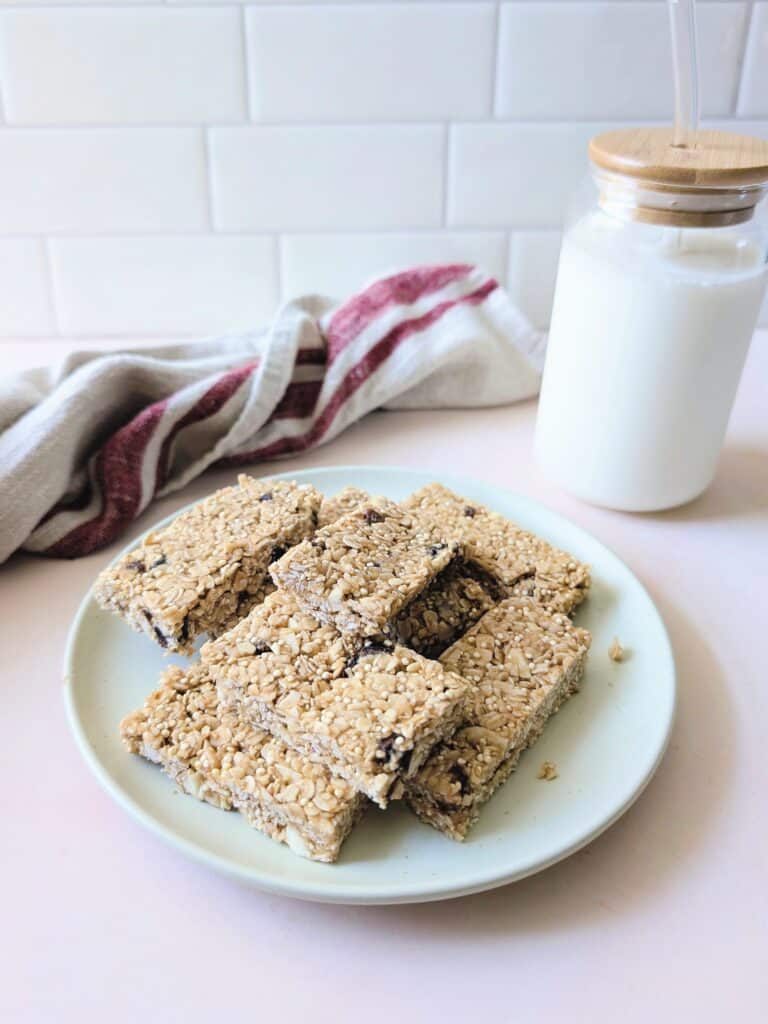
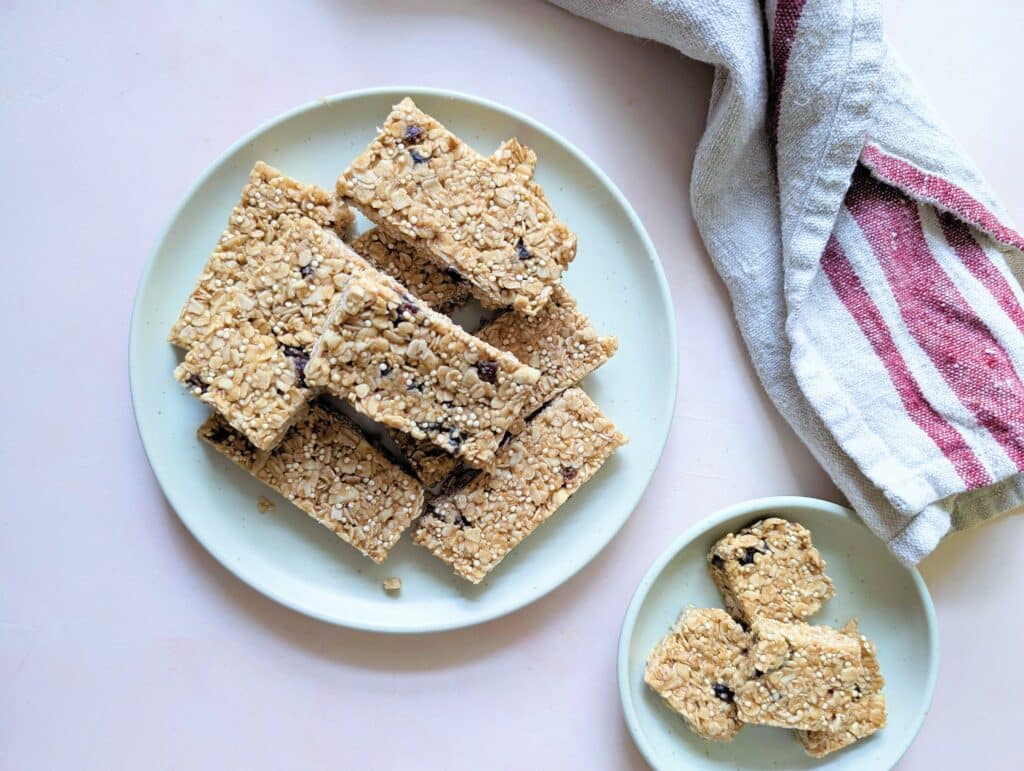
These no-bake peanut butter oat bars it’s just the kind of snack I love to have stashed away in the freezer for those moments. They’re chewy, nutty, slightly sweet, and easy to grab when everyone needs something satisfying, stat!
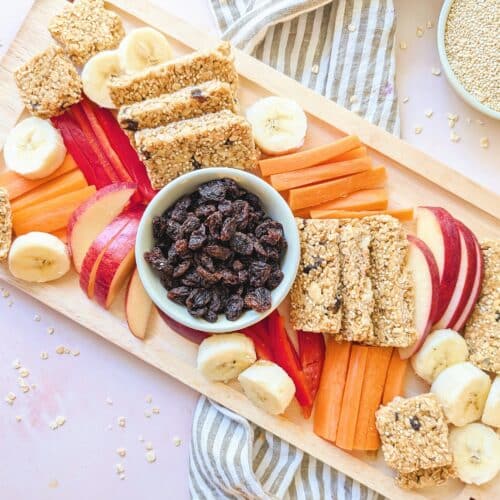
As a nutritionist and mom of three, I know a thing or two about snacks kids love. It needs to offer some staying power without making things complicated. These bars combine oats, quinoa, peanut butter, nuts and dried fruit for a delicious mix of carbs, fat, fiber and plant-based protein. Translation; They’re a great choice when kids need a little boost of energy between school and what’s next.
And if your family loves homemade snack bars as much as mine, you might also want to try these no-bake whole grain chocolate bars, these sweet and savory chocolate lentil bars (these are the most popular recipes on my site!) for delicious afternoons.
Because you’ll love these no-bake quinoa oat bars
Make these no-bake oat bars once, pop them in the freezer, and you’ll have an easy after-school snack ready when everyone walks through the door hungry. Future Sarah is always happy about it!
They take about 15 minutes to prepare, require no baking and are made with simple catering ingredients. The texture is chewy and slightly crunchy, and the peanut butter-maple combination makes them taste sweet enough without being overwhelming.
They are also great for:
- After school snack before activities
- Fuel for work when dinner is still a little way off
- Weekend snack between meals
- A quick bite before sports, dance, swimming or music lessons
- Hungry parents who also need something quick while standing in front of the freezer. Because YOU deserve to feed yourself too.
Because these bars work as an after school snack
After school can be a difficult window for snacks. Children are often tired, overstimulated and really hungry. Some days, they barely touch lunch. Other days, they have to eat before heading out the door. And some days they just need a snack and a couch moment before they can answer the question, “How was your day?”
That’s where a snack like this can really come in handy. Oats and dried fruit provide carbohydrates, which children need for energy. Peanut butter, quinoa, and chopped nuts add fat, fiber, and plant-based protein, which help make the bars more filling. I don’t believe that snacks have to be “perfect” to count, but I do like when they’re both easy and filling enough to get the kids through the rest of their day.
How to Make No-Bake Peanut Butter Quinoa Oat Bars
These bars come together quickly, just what we want in a homemade snack. Start by heating the peanut butter, maple syrup, coconut oil, vanilla, and salt together in a medium saucepan over medium-low heat. Stir until everything is melted and homogenized. You can also do this in the microwave by heating the peanut butter in small increments and stirring together.
Once the peanut butter mixture is smooth, stir in the oats, quinoa, chopped nuts and dried fruit. The mixture will be thick and sticky, which is what you want.
Next, line an 8-inch or 9-inch square pan with parchment paper and add the mixture to the pan. This is the most important step: press it down very firmly and evenly.
This is not the time for a gentle pat-pat situation. Press it down like you mean it so the bars will condense and hold when they cool. I like to put a second piece of parchment paper on top of the mixture before pressing it so it doesn’t stick to my hands.
Then transfer the pan to the freezer for 20 to 30 minutes, until the bars are firm but not frozen. Cut into squares or bars and enjoy!
Tips for making no-bake bars that hold together
If you’re new here, I test every recipe to make sure it’s perfect before you try it! And this recipe is no exception. Homemade no-bake bars can be a little finicky if not pressed firmly enough or chilled enough. So here are my tips to make it work.
- Use quick-cooking oats if you can. They create a better texture and help the bars hold more easily than large flaked oats.
- Press the mixture firmly and evenly into the pan. This step is more important than you think.
- Chill bars until firm before slicing. If they are too soft, they may crumble.
- Store them in the freezer, not the fridge. They soften as they thaw, so freezing is the best place to keep them.
- And finally, enjoy them within minutes of taking them out of the freezer. They are best when they are slightly soft but still firm enough to hold their shape.
Are these bars safe for school?
Because these bars contain peanut butter and chopped nuts, they are not school safe for nut-free classrooms. I think of them more as after school snacks, freezer snacks at home, road trip snacks, or pre-activity snacks.
To make them more school friendly, you could try swapping the peanut butter for sunflower butter and leaving out the chopped peanuts or cashews. You could also replace the chopped nuts with extra oats, pumpkin seeds, sunflower seeds, raisins, or chopped dates, depending on what your school allows.
Just keep in mind that every school and daycare has different allergy policies, so always check before packing them in a lunchbox. If you need a tried-and-true nut-free option, these whole-wheat no-bake chocolate snacks for school are a better fit.
No-Bake Peanut Butter Oat Bars (from Dietitian Mom)
These no-bake peanut butter oat bars are chewy, freezer-friendly, and perfect for after-school snacks. Made with oats, peanut butter, quinoa, nuts and dried fruit.
- 1/2 cup natural peanut butter
- 1/4 cup pure maple syrup
- 2 tablespoons coconut oil
- 1 teaspoon vanilla extract
- 1/4 teaspoon salt
- 1 2/3 cups quick-cooking oats
- 1/4 cup quinoa
- 3 tablespoons chopped peanuts or cashews
- 3 tablespoons dried dates or raisins chopped
In a medium saucepan over medium-low heat, melt together the peanut butter, syrup, coconut oil, vanilla, and salt. When ready, remove from heat and stir in oats, quinoa, chopped nuts and fruit. (To use a microwave, melt the peanut butter in 45-second increments, stirring between them, then transfer to a mixing bowl and stir in the remaining ingredients.)
Line an 8-inch or 9-inch square pan (to make these squares using a loaf pan, see notes below). Add the mixture to the prepared pan, pressing very firmly and evenly to help the bars stick together. I like to place a second sheet of parchment on top of the mixture first to keep it from transferring to my hands. Transfer the pan to the freezer for 20 to 30 minutes until firm but not frozen. Cut into squares (or bars if you prefer) and enjoy!
Storage
Store leftover bars in an airtight container in the freezer. Remove individual bars as needed and enjoy within about 5 minutes, before they thaw and get too soft.
Oats
Quick-cooking oats pair best in this recipe. You can use old-fashioned rolled oats, but for the best texture, put them in a food processor a few times first.
Dried fruits
Chopped dates or raisins work well.
Nuts
Chopped peanuts or cashews work well in this recipe.
Pan size
An 8-inch or 9-inch square pan works well.
To use a parchment-lined 4 × 8-inch or 5 × 9-inch loaf pan, follow the recipe as written, but divide the prepared mixture in half. Press half the mixture into the pan, freeze, slice, wrap and refrigerate. Repeat with the second half of the mixture.
Nut free note
This recipe contains peanuts and/or tree nuts and is not suitable for nut-free school environments as stated. To make it more school-friendly, try using sunflower butter instead of peanut butter, and replace the chopped nuts with extra oats, pumpkin seeds, sunflower seeds, raisins, or chopped dates, depending on your school’s allergy policy.

Sarah Remmer, RD, is a registered dietitian and mom of three, specializing in family and pediatric nutrition. She is its founder Central Collective Nutrition and has nearly 20 years of experience helping families feel confident about feeding their children.