")
As a yoga teacher and naturally flexible person, I am often told by people that they don’t do yoga because they are not flexible. But that’s it Why you do yoga! Among my favorite poses for increasing flexibility is the forward sit, also known by its Sanskrit name pashimottanasana. (Pronounced PAH-she-moh-ton-AHS-uh-nuh.)
Forward bending may not look like much in a single still image. But what you can’t see is how this stretch benefits so many different parts of your body.
“Paschimottanasana it stretches the entire back of the body, which is a continuous chain of fascia and muscle,” says Stephanie Saunders, vice president of fitness programming for BODi. So is very more than just a hamstring stretch.
Read on to learn how to master this beneficial core posture.
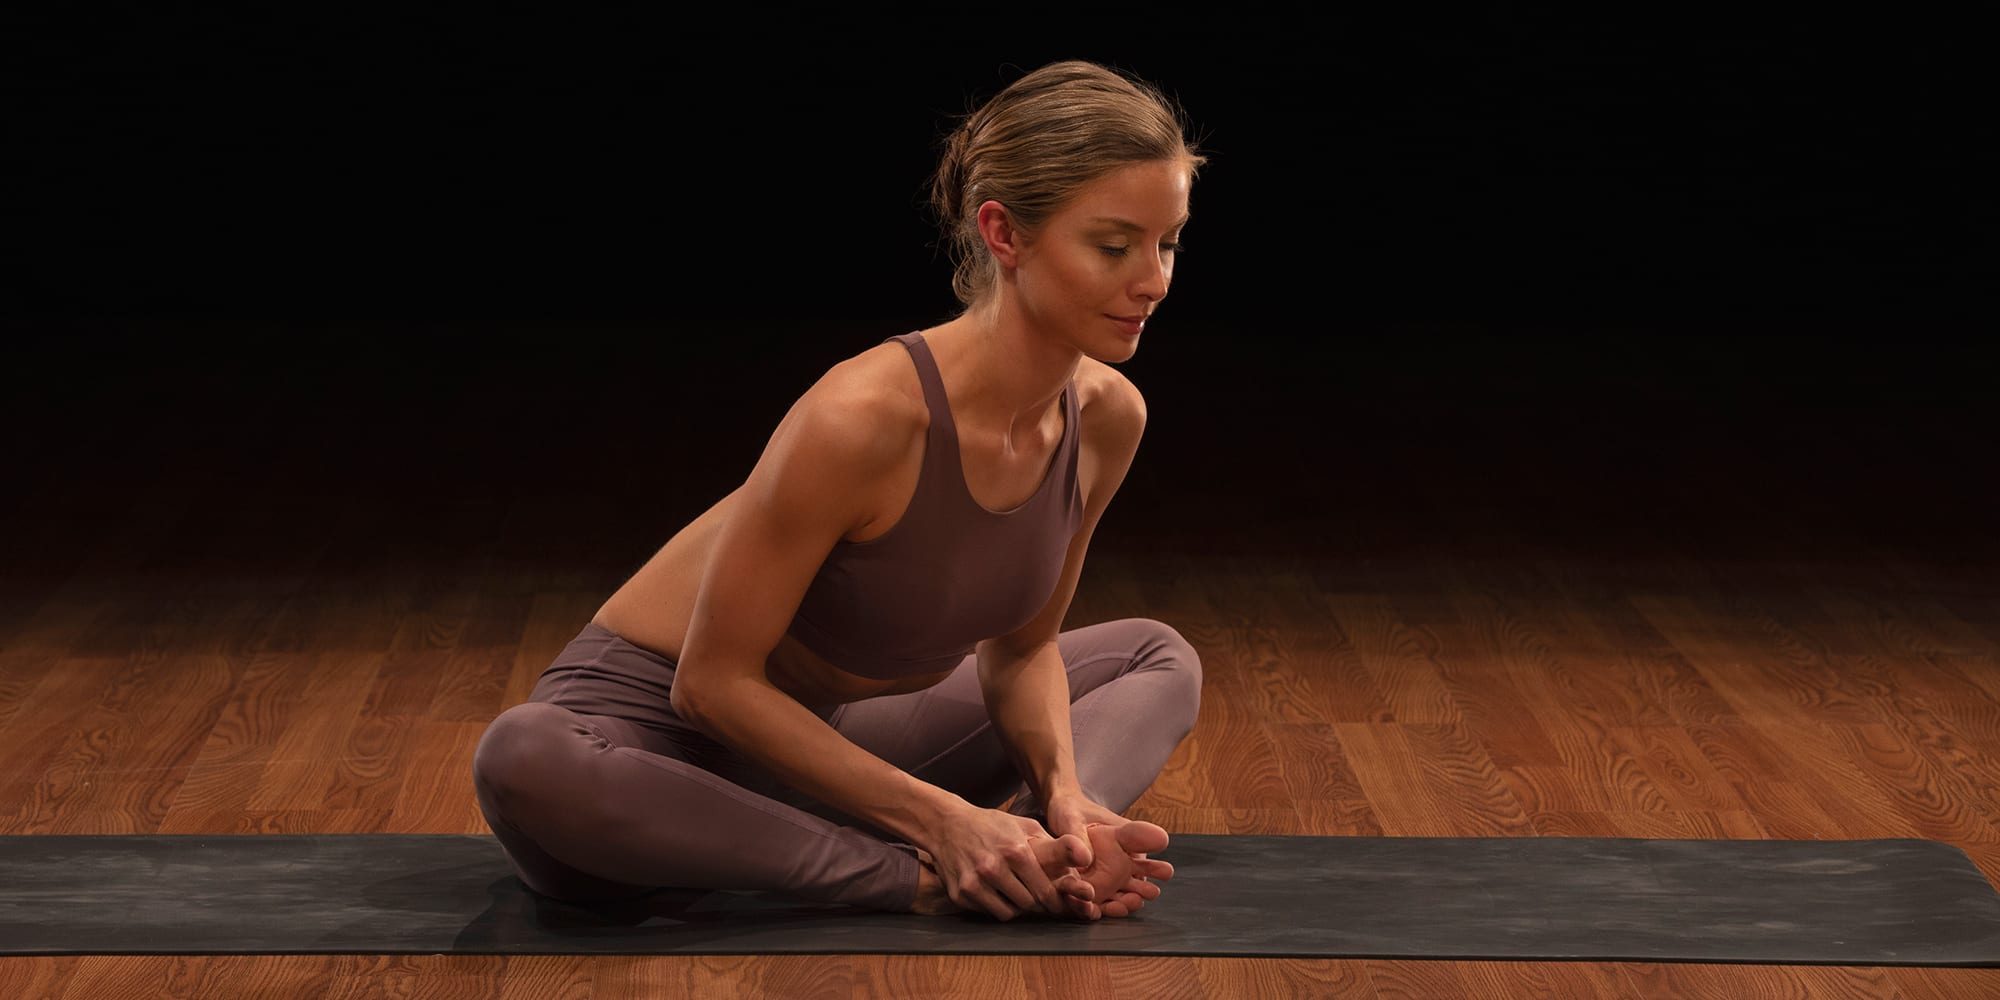
Seat forward (Paschimottanasana): Step-by-step instructions
- Start in staff pose: Sit tall on the floor with your legs extended together in front of you, your legs bent and your toes pointed toward the ceiling. Your hands should rest on your thighs or on the floor next to them.
- Pulling your abs in and hinging at your hips—not your waist—bend forward and slowly walk your hands under your legs, toward your feet. Avoid excessively rounding your back or using your arms to pull yourself into the pose.
- Grasp your big toes, the sides of your feet, your shins, your ankles—whatever your flexibility allows, without straining—and rest into the pose while maintaining a neutral spine.
- Hold for five or more breaths. With each exhalation, try to relax into the pose to get a deeper stretch.
How to make forward bending easier
Paschimottanasana it’s an intense stretch that can be done comfortably by everyone, even beginners. Modifying the forward folding of the seat will not reduce its advantages, but will make it more accessible.
- “If you have tightness in your hamstrings or hips, releasing your lower back may require lifting your hips (sitting on a yoga block or folded blanket) or bending your knees,” says Saunders.
- “If the tightness is in your back, try reaching out with an extended spine before relaxing forward, use a block on either side of your knees to support your hands, and trust gravity to do the rest “, says.
- You can also part your feet so that your heels are hip-width apart. This should leave more room for your chest and belly.
How to make the forward seat bend harder
The forward seat is a severe stretch in the rear. For those with flexible hamstrings and no lower back pain, it is possible to intensify the posture.
- Bend your toes with your legs straight and you can intensify the stretch in your hamstrings.
- Hold a yoga block in place on the soles of your feet to deepen the stretch.
Beginner tips for doing a forward seat
Paschimottanasana it has nothing to do with depth. Many beginners think they have to keep their legs straight and touch their noses to their knees to “work” this pose.
In fact, maintaining a neutral spine and bent knees is safer and just as “correct.” Rounding the spine to bring your nose to your knees can cause lower back pain and compression. Instead, focus on resting your upper body on your thighs.
When starting to practice sitting forward fold, it’s important to listen to your body and breathe. If you can’t hold your pose for three long breaths, you may have gone too deep, too fast. Take your time to find your depth in this pose. Stay, breathe, go deep.
Advantages of forward bending
Paschimottanasana it’s a simple pose with a wide range of benefits.
- It stretches the back of your body from the heels to the head
- It helps to lengthen the spine
- Creates inner calm through breathing
Seated Forward Bend Variations
If you’re looking for other types of twists that provide slightly different stretches, here are a few to try.
1. Standing forward bend (Uttanasana)

- Start at the top of your mat in mountain pose. Inhale and raise your arms straight up, turning the triceps forward. Exhale, hinge your hips and touch the floor.
- Bend your knees slightly, fold your torso over your legs and lengthen your spine all the way down.
- Bring your fingertips or palms to the floor, fingers in line with your toes.
- Look down at your feet. Pull your shoulders to the sides and away from your ears.
- Raise the arches of the feet. Extend the legs by lifting the kneecaps.
- Lift your tailbone up toward the ceiling as you rotate your thighs inward.
- Shift your weight slightly forward into your legs so that your hips line up over your heels.
- If you can, begin to straighten your legs.
2. locked angle attitude (Baddha konasana)
- Sit on the floor with your glute bones directly underneath you. (This prevents you from pinching your tail.)
- Bring the soles of your feet together, letting your knees fall to the sides. The outer edges of your feet should touch.
- Draw your heels as snug as possible in the groin area.
- Place your thumbs on the balls of your feet and wrap the rest of your toes around the tops of your feet, as if you were holding an open book.
- Keeping a tall spine, fold forward without over-rounding your back or letting your knees roll forward. Hold for at least five breaths or up to one minute.
3. Seat with wide leg forward (Upavistha konasana)

- Start in staff pose: Sit tall on the floor with your legs extended together in front of you, your legs bent and your toes pointed toward the ceiling. Your hands should rest on your thighs or on the floor next to them.
- Spread your legs as wide as possible, with your feet bent and toes pointing toward the ceiling.
- Make sure you don’t let your back round, hinge at your hips and slowly walk your arms forward. Hold for 30 to 60 seconds.